My struggles to make posts work properly
Published on March 23, 2025 (Updated on April 08, 2025)
Tags: GitHub Pages, Jekyll, debug
😎 Nerd your day! 🤓
Update on April, 2025
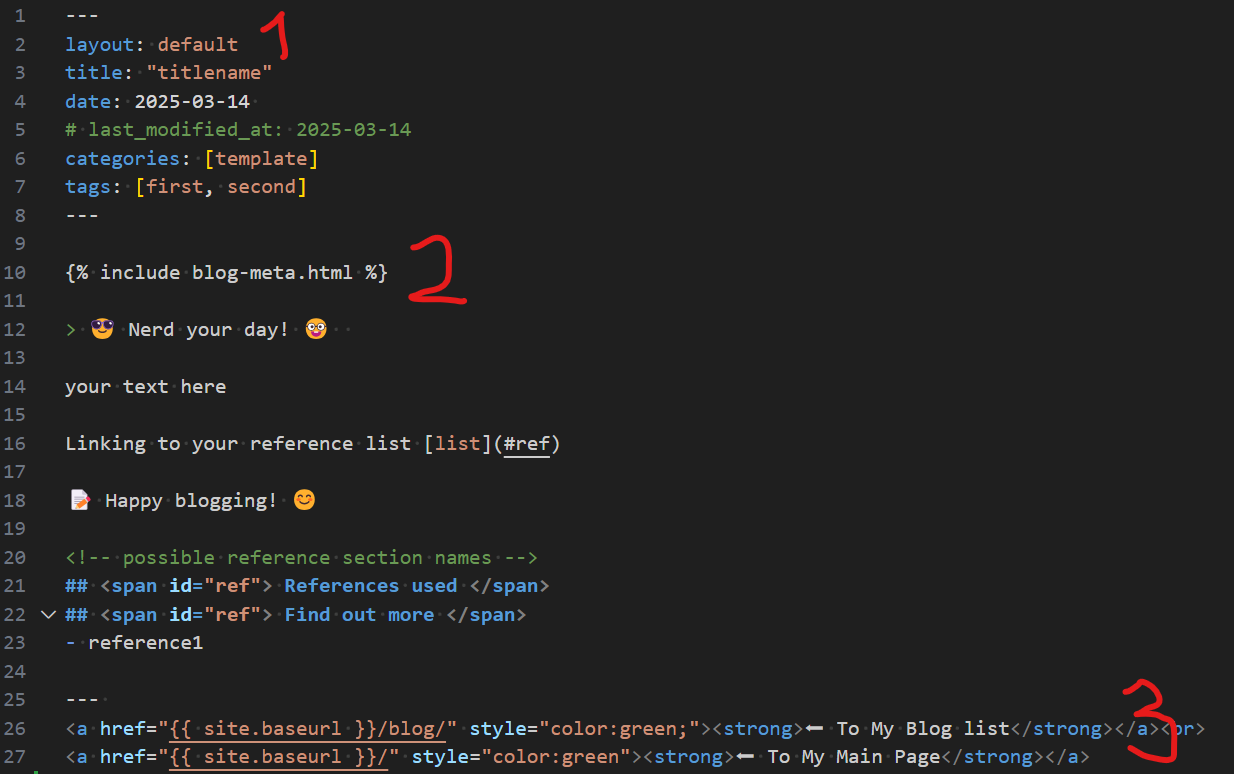
I found, if not a solution, at least a workaround; with the use blog-meta.html file (see here). Basically,
- now all blog post are using default theme with
layout: default(instead oflayout: postthat was used previously) - metadata like “Published on” etc are included with
include blog-meta.htmlcommand - I add links to my blog list and main page in each blog post file
- this is a bit bummer, and therefore my previously used “post.html” method, described here, would have been better.

Why my post.html approach does not work?
To be honest, I do not know for sure, but based on discussion I had with our own 🤖 friend chat-GPT, its suggestion seems reasonable:
That’s called a layout chaining technique, where
post.htmlextendsdefault.html. That part is totally fine in theory — but in practice, your _layouts/post.html doesn’t contain any actual HTML contentAnd here’s the issue: Jekyll does not render the front matter from a layout file like a normal page/post. The layout: default inside post.html is ignored. So even though it looks like you’re inheriting from default, you’re actually not—and that’s why your post page has no CSS or structure applied.
Please do not hesitate to reach me out if you know, how I can fix this! ✉︎
Previous text
In this post, I’ll be documenting my journey to make my blog posts, like this, work probably. Originally, idea was to demonstrate how a markdown file is converted to a blog post. But, because of problems reported below, this turned to be documentation of the problem. Let’s see if I find any solution!
I noticed problems related to blog post pages from the headings; they are just not implemented as they should. So, let’s deep dive into the problem!
This is H1 title text
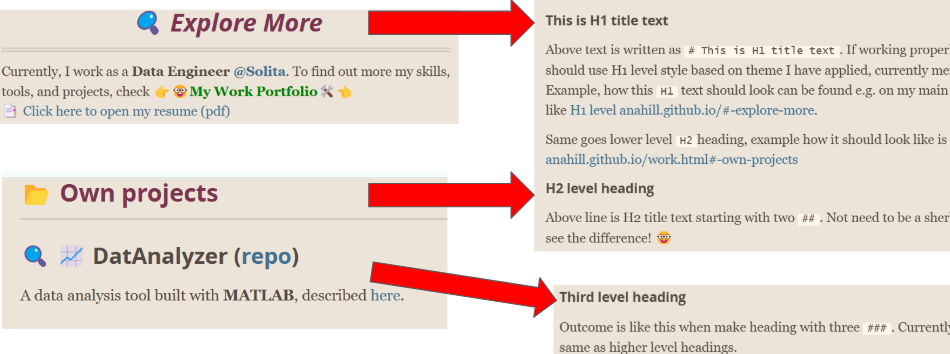
Above text is written as # This is H1 title text. If working properly, it should use H1 level style based on theme I have applied, currently merlot. Example, how this H1 text should look can be found e.g. on my main page like H1 level anahill.github.io/#-explore-more.
Same goes lower level H2heading, example how it should look like is
anahill.github.io/work.html#-own-projects
In the following pic, I try to demonstrate this: You do not need to be a sherlock to see the difference! 🤓

H2 level heading
Above line is H2 title text starting with two ##.
Check how H1 looks
Above line is created with # tag, so it should use header level 1 style. You can see the difference if you use e.g. the following code.
<h1 style="font-size: 2.2em; color: #600000; font-weight: bold;">
    This is H1 title text with `h1` tag and attributes written in html
</h1>
Above code result following heading text.
This is H1 title text with `h1` tag and attributes written in html
After page is built, you can see the outcome; so yes, probably I could always manually apply html to each headings in my blog posts, but I do not want to do that.

Let’s test pure h1 element also, below I have written <h1> Pure h1 element, no attributes included </h1>.
Pure h1 element, no attributes included
Third level heading
Outcome is like this when make heading with three ###. At the time of writing, outcome is same as higher level headings.
Fourth last time
Same goes this: style.css should now include definition for also forth level headings ####, but you can see the outcome.